- Loading Option Parameters
**WARNING: HOLDING DOWN 7 AND 9 KEYS WHILE POWERING ON THE CONTROL WILL CLEAR/DELETE ALL EXISTING MEMORY IN THE CONTROL**
1) Hold down keys 7 and 9 while powering on the control to dump memory/clear file. Control will then come up in IPL mode.
Hold down the . and – keys, while powering on the control, if you only want to get to IPL MODE without clearing control memory.
2) In IPL mode, Type in 99, then input.
3) At the first (?) type in the first password, then hit input. The passwords will not appear on the screen. Do the same for the second and third passwords. *This step only applies for the 15 control.*
4) Initialize/Generate system label ok? Choose `{`Y`}` for yes.* On the 15 control, this step will not be used.*
5) Axis ? # of axes Examples: Standard Lathe=2 (X and Z)
Standard Mill=3 (X, Y, & Z)6) Start putting 9100 option parameters in. Parameters are in hexadecimal. Ex. Option 3? 22 then input key. Binary – 00100010 Hex – 22
7) If you are not putting any parameters in any of the options, skip them by hitting the input key.
8) If you miss an option or put the wrong information in an option you will have to start over from the beginning.
9) When done loading options, input down to clear file of ? Type in Y, then input.
10) Choose 6 end IPL to end IPL mode.
11) Ready to load parameters.
- FANUC Servo Alarm 5136 Number of Amps Too Small on FSiA_B Workaround
- Put control in mdi mode
- Press offset/setting hard key
- Press setting soft key
- Parameter write enable should be displayed at top of screen and should be highlighted
- Press “1” and input
- Should now see alarm screen with “p/s 100 parameter write enabled”
- Press system hard key
- Press parameter soft key
- Type in parameter “2165” then press “nr. Srh”
- Highlight any axis that is turned on, meaning “1”, and type “0” and input
- Press offset/setting key, will then take you back to paramater write enable screen
- Change parameter write enable back to “0”
- Press “reset”
- All alarms should be gone. If not, power down the control and power back up.
- Installing Servo Software
- Hold down the right two soft keys under the screen to get into the Boot System and turn on control.
- Install the card in slot on the front of the control.
- Select SYSTEM DATA LOADING from the main menu.
- Select DGSERVO (This will be the only file on the card).
- Select YES when prompted. Wait for the screen to say COMPLETE.
- Select END to get back to the main menu, and then END again. Finally, select YES.
- Power down and power up, control should now boot normally and servo software is updated.
- FANUC Series 16/18 Backup and Restore Procedure
Data Input/Output Operation
Output the following data when it is possible in normal conditions.
a. CNC parameter
b. Pitch error compensation data
c. PMC parameters
d. Custom Macro Variables
e. CAP data
f. Part programs
g. Tool offset data1. Check the parameters for data output operation.
*The data is not able to output in alarm condition.*PRM 0000 ISO =
0 Output in E1A code
1Output in ISO codePRM 0020 Selection of I/O channel
0: Channel 1 (JD5A on Main CPU board)
Set PRM 0101 ~ 01031: Channel 1 (JD5A on Main CPU board)
Set PRM 0111 ~ 0113
2: Channel 2 (JD5B on Main CPU board)
Set PRM 0121 ~ 0123
3: Channel 3 (JD5C on Option 1 board)Set PRM 0131 ~ 0135
PRM 0101, 0111, 0121, 0131

bit 7(NFD)
0: FEED is output in punch out mode.
1: FEED is not output in punch out mode.bit 3(ASI)
0: To use E1A code or ISO code.
1: To use ASCII code in data input mode.bit 0(SB2)
0: 1 stop bit.
1: 2 stop bits.PRM 0102, 0112, 0122, 0132
PRM 0103, 0113, 0123, 0133

PRM 0134, 0135: See Parameter manual for details of these parameters, if necessary.Output of CNC Parameters
1. Select EDIT mode.
2. Select PARAMETER screen by pressing `{`SYSTEM`}` key and (PARAM) soft key.
3. Press (OPRT) soft key and ( > ) right arrow soft key.
4. Press (PUNCH) soft key and (EXEC) soft key.Output of Pitch Error Compensation data
1. Select EDIT mode.
2. Select PITCH ERROR COMPENSATION screen by pressing `{`SYSTEM`}` key and (PARAM), (>), and (PITCH) soft keys.
3. Press (OPRT) and (>) soft keys.
4. Press (PUNCH) AND (EXEC) soft keys.Output of PMC Parameters
1. Select MDI mode.
2. Turn on Parameter Write Enable.
3. Press `{`SYSTEM`}` key and (PMC) soft key.
4. Press (PMCPRM) and (KEEPRL) soft keys.
5. Move the cursor to K17 and set bit 1 to “1”.
6. Select EDIT mode.
7. Press () soft keys.
8. Press (I/O) soft key to set parameters for I/O operationCHANNEL NO. = Press “1” and `{`INPUT`}` keys.
DEVICE NAME = Press (FDCAS) soft key.
KIND OF DATA = Press (PARAM) soft key.
FUNCTION =Press (WRITE) soft key.
FILE NO =Press `{`-`}` `{`1`}` `{`INPUT`}` keys.
9. Press (EXEC) soft key.Output of Custom Macro Variables
1. Select EDIT mode.
2. Display TOOL OFFSET screen by pressing `{`OFFSET`}` key.
3. Press (>) and then (MACRO) soft keys to display macro variable screen.
4. Press (OPRT) and then (>) soft keys.
5. Press (PUNCH) and (EXEC) to output variables No. 500 ~ 999.Output of Part Programs
1. Verify NC PRM 3202 bit 4 and bit 0 = 0. If “1”, 8000 and 9000 series programs are protected and will not be output.
2. Select EDIT mode.
3. Select PROGRAM screen by pressing `{`PROG`}` key and (PRGRM) soft key.
4. Press (OPRT) and (>) soft keys.
5. Key in “O-9999” to output all programs.
6. Press (PUNCH) and (EXEC) soft keys.Output of Tool Offset Data
1. Select EDIT mode.
2. Display to TOOL OFFSET screen by pressing `{`OFFSET`}` key and (OFFSET) soft key.
3. Press (OPRT) and (>) soft keys.
4. Press (PUNCH) and (EXEC) soft keys.Output of Conversational Function Data
1. Select EDIT mode.
2. Display TOOL DATA MENU screen by pressing `{`OFFSET`}` key twice.
3. Press (PUNCH) soft key to output Tooling Data.Restoring Memory
Depress EMERGENCY STOP button.
Verify correct communication parameters from output procedure.Input of CNC Parameters
1. Display to PARAMETER screen by pressing `{`SYSTEM`}` key and (PARAM) soft key.
2. Press (OPRT) and (>) soft key.
3. Press (READ) and (EXEC) soft keys. Parameters will be input.
4. When input is complete, power the CNC OFF and ON.
Parameter No. 1815 bit 5 set to “0” will disable an alarm 310 with an Absolute Pulse coder system.Input of PITCH ERROR COMPENSATION data
1. Select EDIT mode.
2. Verify Parameter Write Enable = 1.
3. Press `{`SYSTEM`}` key and (PARAM), (>), and (PITCH) soft keys.
4. Press (OPRT) and (>) soft keys.
5. Press (READ) and (EXEC) soft keys to input Pitch Error data.Input of PMC PARAMETERS
1. Verify Parameter Write Enable = 1.
2. Press `{`SYSTEM`}` key and (PMC) soft key.
3. Press (PMCPRM), then (KEEPRL) soft keys.
4. Move cursor to K17 and press `{`1`}`, `{`0`}` and `{`INPUT`}`.
5. Select EDIT mode.
6. Press () soft keys.
7. Press (I/O) soft key, and set parameters for I/O operation.
CHANNEL NO=press `{` 1 `}` and `{` INPUT `}` keys.
DEVICE NAME=press (FDCAS) soft key.
FUNCTION=press (READ) soft key.
FILE NO=PRESS `{` 2 `}` and `{` INPUT `}` keys.
8. Press (EXEC) soft key to read PMC parameters.Input of CUSTOM MACRO VARIABLES
1. Select EDIT mode.
2. Turn off the Program Protect key.
3. Press `{`PROGRAM`}` key and (PRGRM) soft key.
4. Press ( > ) soft key.
5. Press `{` O `}` and `{` 1 `}` keys, then (READ) and (EXEC) softkeys.
6. Select AUTO mode and execute program O0001.
7. Verify variables were written to Macro Variable table.
8. Delete program O0001.Input of PART PROGRAMS
1. Set the following parameters in MDI mode, if necessary.
PRM 3201,bit 6=1
PRM 3201, bit 1=0
PRM 3202, bit 4=0
PRM 3202, bit 0=0
2. Select EDIT mode.
3. Turn off the Program Protect key.
4. Press `{`PROGRAM`}` key and (PRGRM) soft key.
5. Press ( > ) soft key.
6. Press (READ) and (EXEC) soft keys to read part programs.Input of TOOL OFFSETS
1. Select EDIT mode.
2. Turn off the Program Protect key.
3. Press the `{`OFFSET`}` key and (OFFSET) soft key.
4. Press the (OPRT) and the ( > ) soft keys.
5. Press the (READ) and (EXEC) soft keys to read in Tool Offsets.Input of CONVERSATIONAL function data
FS16/18-MA/TA/TTA, CAP-IFS-16MA
1. Select EDIT mode.
2. Turn off the Program Protect key.
3. Press the `{`PROGRAM`}` key and (PRGRM) soft key.
4. Press the (>) soft key.
5. Press `{` O `}` and `{` 1 `}` keys, then (READ) and (EXEC) soft keys to read data.
6. Set parameter 3401 bit 0 = 0, in MDI mode.
7. Select AUTO mode.
8. Execute program O0001.
9. Confirm cutting condition and tool preparation data are restored.
10. Delete program O0001.
11. Set parameter 3401 bit 0 to 1 in MDI mode.FS-16/18-TA, FS16/18-TTA
1. Select EDIT mode.
2. Turn off the Program Protect key.
3. Display the Tool Data Menu screen by pressing the `{`OFFSET`}` key twice.
4. Press the (READ) soft key to read in the Conversational function data.
5. Verify the data has been restored. - FANUC Spindle Alarm Codes
Alarm A (AL-A) ROM Abnormality
Cause: Incorrect ROM, ROM not installed correctly, error with control circuit.
Remedy: Install correct ROM, replace control circuit.Alarm 01 (AL-01) Motor Overheat
Causes: Damaged motor fan, overload, motor cooler is dirty, loose connection.
Remedy: Replace parts, clean cooler, check connections, review cutting conditions.Alarm 02 (AL-02) Excessive Speed Deviation
Causes: Overload, transistor module is damaged, loose connections, error with speed feedback signal, blown fuse.
Remedy: Replace parts, check connections, review cutting conditions.Alarm 03 (AL-03) Blown Fuse in DC Link Section
Causes: Indicates that the fuse F4 in DC link is blown (models 30S and 40S).
Remedy: Check power transistors and replace fuse.Alarm 04 (AL-04) Input fuse blown / Input power open phase
Causes: Defective transistor module, blown fuse.
Remedy: Replace parts, replace fuse.Alarm 05 (AL-05) Control Power Supply Fuse Blown
Causes: Defective PCB, Abnormal power supply voltage.
Remedy: Check power supply, replace PCB, replace fuse.Alarm 07 (AL-07) Excessive Speed
Causes: Incorrect parameter setting.
Remedy: Reset parameter value.Alarm 08 (AL-08) High Input Voltage
Causes: AC power supply too high, incorrect setting of toggle switch for voltage setting.
Remedy: Change setting from 200V to 230V.Alarm 09 (AL-09) Heat sink is overheated
Causes: Cooling fan is defective, overload, dust and dirty.
Remedy: Replace fan, review cutting conditions, clean parts.Alarm 10 (AL-10) Input Power Voltage Low
Causes: Drop in input power, momentary power failure.
Remedy: Correct case and reset alarm.Alarm 11 (AL-11) Overvoltage of DC Link Circuit
Causes: High power impedance, PCB or transistor module are defective.
Remedy: Check AC power, replace damaged parts.Alarm 12 (AL-12) Overcurrent flows to DC Link Circuit
Causes: Output terminals or internal motor of motor is shorted, defective PCB or transistor module.
Remedy: Check connections, replace damaged parts.Alarm 13 (AL-13) CPU Inter Data Memory Alarm
Cause: Defective PCB
Remedy: Replace PCBAlarm 15 (AL-15)
Cause: Spindle switch /output switch alarm.
Remedy: Check sequence.Alarm 16 (AL-16) RAM Abnormality
Causes: Defective RAM or PCB.
Remedy: Replace RAM, replace PCB.Alarm 18 (AL-18) Program ROM sum check error
Causes: Defective ROM.
Remedy: Replace ROM.Alarm 19 (AL-19)
Causes: Defective A/D convertor or PCB, loose connections.
Remedy: Replace A/D convertor, replace PCB, check connections.Alarm 20 (AL-20)
Causes: Defective PCB, loose connections.
Remedy: Replace PCB, check connections.Alarm 24 (AL-24)
Causes: CNC power off, defective optical cable.
Remedy: Turn power on, clean or replace optical cable, replace LSI, replace PCB.Alarm 25 (AL-25)
Cause: See Alarm 24
Remedy: See Alarm 24Alarm 26 (AL-26)
Cause: Defective signal level/line of spindle motor for C axis control, defective detector circuit for C axis control, incorrect parameter setting.
Remedy: Check signal level, connect signal cable securely, replace detector circuit, set correct parameter value.Alarm 27 (AL-27)
Causes: Position coder signal line defective, incorrect parameter setting.
Remedy: Connect signal cable securely, replace signal cable, set correct parameter values.Alarm 28 (AL-28)
Cause: Defective signal level/line of spindle motor for C axis control, defective detector circuit for C axis control.
Remedy: Check signal level, connect signal cable securely, replace detector circuit.Alarm 29 (AL-29)
Cause: Overload.
Remedy: Review cutting conditions.Alarm 30 (AL-30)
Cause: Defective power transistor, defective PCB.
Remedy: Replace power transistor, replace PCB.Alarm 31 (AL-31)
Cause: Motor constrained, defective motor speed reversion signal/signal cable
Remedy: Connect cable securely, replace cable.Alarm 32 (AL-32)
Cause: Defective LSI.
Remedy: Replace LSI, replace PCB.Alarm 33 (AL-33)
Cause: Defective relay, disconnected resistor.
Remedy: Replace amp.Alarm 34 (AL-34)
Cause: Incorrect parameter setting
Remedy: Set correct parameter values.Alarm 35 (AL-35)
Cause: Incorrect parameter setting for gear ratio and position gain data.
Remedy: Set correct parameter values.Alarm 36 (AL-36)
Cause: Error count overflow
Remedy: Correct cause and reset alarm.Alarm 37 (AL-37)
Cause: Incorrect parameter setting (No.6511)
Remedy: Set correct parameter values.Alarm 39 (AL-39)
Cause: Incorrect ROM version.
Remedy: Replace ROM version.Alarm 40 (AL-40)
Cause: No occurrence of 1-rotation signal.
Remedy: Make 1-rotation signal offset adjustment, check cables.Alarm 41 (AL-41)
Cause: Incorrect parameter setting (No. 6503), incorrect amplitude and offset of position coder feedback signal.
Remedy: Set correct parameter value, adjust feedback signal, check shielding status.Alarm 42 (AL-42)
Cause: Position coder 1-rotation signal not detected.
Remedy: Make 1-rotation signal adjustment for signal conversion circuit.Alarm 43 (AL-43)
Cause: Disconnection of position coder signal for differential speed mode.
Remedy: Check main spindle position coder signal is connected to connector CN12Alarm 46 (AL-46)
Cause: Failure in detecting position coder 1-rotation signal in thread operation.
Remedy: Make 1-rotation signal adjustment for signal conversion circuit. Check cable shield status.Alarm 47 (AL-47)
Cause: See Alarm 41
Remedy: See Alarm 41Alarm 48 (AL-48)
Cause: The position coder 1-rotation speed is too high
Remedy: Make 1-rotation signal adjustment for signal conversion circuitAlarm 49 (AL-49)
Cause: The converted differential speed is too high
Remedy: Calculate differential speed and check if this value is not greater than maximum speed of motor.Alarm 50 (AL-50)
Cause: Excessive speed command calculation value in spindle synchronization control.
Remedy: Calculate motor speed and check if it is not greater than max motor speedAlarm 51 (AL-51)
Cause: Undervoltage at DC link section.
Remedy: Correct cause and reset alarm.Alarm 52 (AL-52)
Cause: ITP signal abnormality I.
Remedy: Correct cause and reset alarm.Alarm 53 (AL-53)
Cause: ITP signal abnormality II.
Remedy: Correct cause and reset alarm.Alarm 54 (AL-54)
Cause: Overload current alarm
Remedy: Check if overload operation or frequent acceleration/deceleration is performed.Alarm 55 (AL-55)
Cause: Power line abnormality in spindle switching/output switching.
Remedy: Check magnetic contractor for power line switching. - How to Diagnose a FANUC High Current Alarm
[Note: A 414 alarm indicates you need to look at your servo drives or servo modules. If after looking at the drives or modules you find an HC LED lit or an 8, 9, A (or 12 for spindle) on the seven-segment display, then you have a high current alarm. Solving for a high current alarm can be tricky because the problem may be caused by the motor, drive, or cable.]
Disconnect the four motor leads from the drive.
Power up and see if you have the HC alarm LED lit.(ALARM CAN BE HC LED, ALARM 8/9/A/b (SERVO), or ALARM 12 (SPINDLE)
If you no longer get the HC alarm, then your motor is probably bad. Note: Spindle HC alarms will not show up until you try to move the motor with a very low speed M command.
If you still have the HC ALARM, then your drive is probably bad. However, we don’t know what caused the drive to fail. By measuring through the four disconnected motor leads, you can check the power cables and the motor at the same time.FIRST: With an ohm meter, check for shorts in the motor by measuring leg-to-leg and leg-to-ground on all three legs. Leg-to-leg readings should be low, but consistent, on all three legs. The leg-to-ground readings should be open, or OL, on all three legs-to-ground.
SECOND: With a megger, check each leg-to-ground. The reading should show infinity (or 500 MEG and above) at the 1000V setting. Check all three legs-to-ground because the problem can be in the power plug/terminal box of the motor or the power cables going from the drive to the motor.
AN OHM METER WILL TELL YOU IF YOUR MOTOR IS SHORTED.
A MEGGER WILL TELL YOU IF YOUR MOTOR IS GROUNDED. - FANUC 6A_B Will Not Zero Return
* WARNING * Use extreme caution while working with or near any moving parts or electrical components. Fatal voltages may exist on the control components, DISCONNECT POWER before attempting any service.
Machine Model:
Problem:Diagnostic procedures and possible solutions 6TA/B Machine will not zero return:
When the machine zero returns, does it decel? If not, check the decel switch.
To check the decel switch – push the decel switch down and check diagnostic #32 bit 5 for X axis and #33 bit 5 for Z axis. If it changes from 1 to a 0 when the switch is depressed, the switch is good.
If the machine does decel, jog the machine away from home position – turn the rapid override switch down – try to zero return the machine and have someone depress the decel switch – (USE CAUTION…DON’T PINCH YOUR FINGERS!)
the machine should slow down – let the switch back up – the machine should find home within one rev of the ball screw. If it does not, you have a bad encoder or a broken cable.
You can test the cable by checking between pins:
14——-F
15——-G
If the machine does home in the middle of travel – try moving the decel dog.6MA/B
Machine will not zero return:When the machine zero returns, does it decel? If not, check the decel switch.
To check the decel switch – push the decel switch down and check diagnostic #32 bit 5 for X axis, #33 bit 5 for Y axis and #34 bit 5 for Z axis. If it changes from 1 to a 0 when the switch is depressed, the switch is good.
If the machine does decel, jog the machine away from home position – turn the override switch down – try to zero return the machine and have someone depress the decel switch – (USE CAUTION…DON’T PINCH YOUR FINGERS!)
the machine should slow down – let the switch back up – the machine should find home within one rev of the ball screw. If it does not, you have a bad encoder or a broken cable.
You can test the cable by checking between pins:
14——-F
15——-G
If the machine does home in the middle of travel – try moving the decel dog.Machine gets a soft alarm when trying to zero return: Command a G23 in MDI then zero return the machine. Machine will not power up: Look for the input unit, is the green LED on? – if not check for 220VAC on terminal strip – if 220VAC is present you probably have a bad input unit.
If 220VAC is not present check machine wiring.
If the green LED is on and the red LED comes on when the power on push button is pushed, turn off the control – Disconnect the outputs from the power supply (these are all the connections on the right-hand side of the power supply). Turn the control on – if the red LED comes on, you probably have a bad power supply.
If it does not come on you probably have a short on the machine. Connect all the 0v connections then connect one wire at a time. Turn the control on each time and see if the red LED comes on. When the red LED comes on, the last wire you hooked up has the short on it. Trace this wire to find the short.RS232 Problems If data is not being input/output or you have a communication alarm.
Check the following:1) Check cable connections (see cable connections below)RS232 Connection for Fanuc Controls
DB25F DB25M2 ————————————————— 3
3 ————————————————— 2
7 ————————————————— 7
Jumper Jumper
4-5 4-5
6-8-20 6-8-20

Parts Provider
All things Automation
FANUC Parts Provider
FANUC Spare Parts
Below is a comprehensive list of FANUC parts available. Our extensive inventory includes a wide range of FANUC spare parts, FANUC robot parts, FANUC CNC parts, and FANUC replacement parts, many of which are ready for immediate delivery. Take a moment to review the selection and see just how many FANUC parts will fit your needs! If you do not see the specific FANUC spare parts you are looking for, let us know, and we’ll gladly work to find stock or offer expedited repair options. Our commitment to providing you with the necessary FANUC robot parts and FANUC CNC parts means we will do everything possible to meet your requirements swiftly. For immediate assistance or inquiries about our FANUC replacement parts, please call or email us. We are here to help ensure you have the FANUC parts you need, exactly when you need them.
FANUC P/N DESCRIPTION ACTION
A06B-0128-B575 AC SVMTR A6/3K A64 ST KY VIEW PART
A06B-0227-B400 AC SVMTR AiF8/3K 1M-A ST BK VIEW PART
A06B-0373-B575 AC SVMTR A2/3K 64K-A ST KY VIEW PART
A06B-6096-H106 ALPHA SVM1-130 F/O VIEW PART
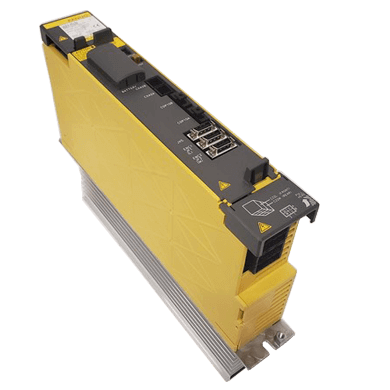
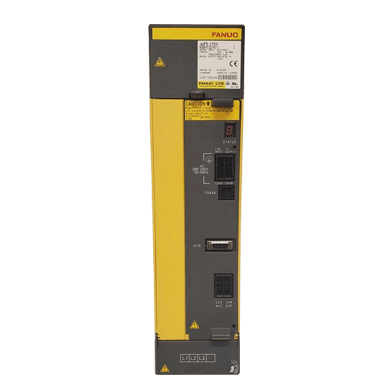
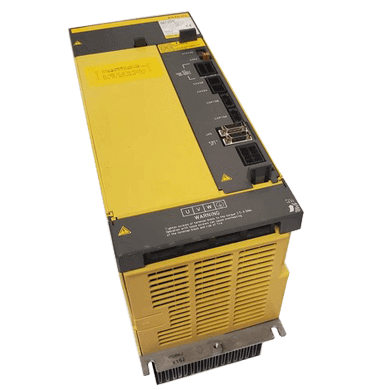
A06B-6110-H030 Ai PSM-30 VIEW PART
A06B-0253-B200 AC SVMTR AiF 30/3K 1M-A ST KY VIEW PART
Our Products
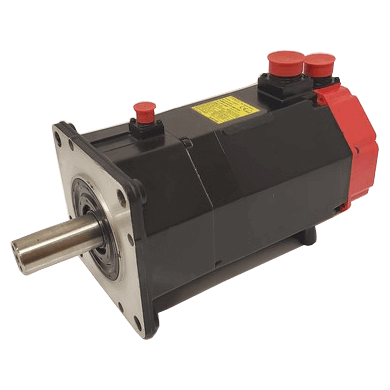
AC SVMTR A12/2K 1M-A ST BK
View Part
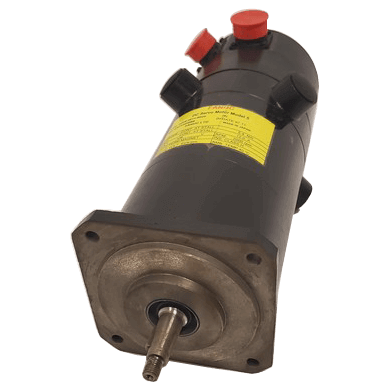
GETTYS FANUC DC SVMTR 5N WITH TACH
View Part
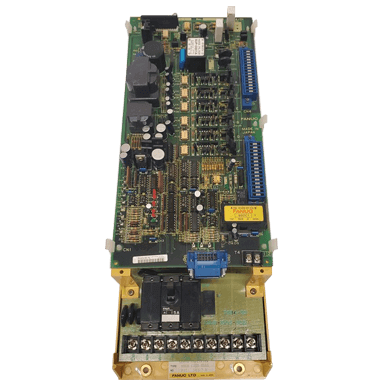
SERVO UNIT AC 10S,20M,0S/3000
View Part
ALPHA SVM2-20/40i
View Part
ALPHA PSM-11HVi
View Part
SVM Ai SV1-180HV
View Part
FANUC Services
FANUC Repair Services
We understand that some parts become obsolete or unavailable. But that does not change the need for a solution.
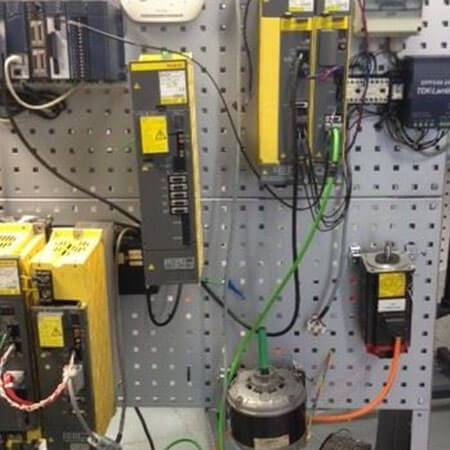
CNC Field Services
Parts Provider has partnered with many service technicians throughout the Southeastern US. Each technician not…

Surplus CNC Removal
Have a machine coming offline, upgrading controls, closing a plant, or need to sell excess or obsolete spares?

“Parts Provider has always gotten me out of a jam and they have had very good pricing. Zach and his team have always helped when I’ve had a problem.”
Joe Citarella

“Zach always come thru when hard to find parts are needed, he always responds quickly, which is a tremendous appreciation in this business.”
Shannon Ranney
“Zach at Parts Provider is great to work with. He is very professional and gets quotes and orders out quickly and correctly. I recommend Parts Provider very highly.”
Todd W.

“For many years now, Parts Provider has done the vast majority of rebuild work for the electrical components on our CNC machines – servo amps, encoders, input/output cards, etc….
They consistently do a good job for us and work with us whenever there’s been an issue or an emergency repair needed. Parts Provider is considered one of our critical service providers.”
Alan L.
“We have many older machines in our shop which have control boards go out routinely. Parts Provider is always open to helping us trouble shoot our machine problems and keeps a lot of inventory on hand. We typically can get boards the same day or overnighted if they don’t have in stock. Parts Provider keeps our machines running.”
Chris G.

“Parts Provider offers timely and thorough service. Attention to detail is an obvious strong point when working with this company. Parts Provider has quick response times and produces nothing but the best.”
Curtis T.

“I have worked with Parts Provider on numerous occasions over many years and always find they are very experienced with the products and know how they function. They have helped my Maintenance technicians figure out issues with machines that saved us valuable time and also costly OEM service calls. They are always available, friendly and kind when needed.”
Jennie S.
“For over 10 years I have had the personal experience working with the Parts Provider team and have never been disappointed. They have always gone the extra mile no matter what time of the day, the response time is immediate and their customer service is excellent on top of producing a premium product. Thank you and I look forward to future business.”
Kim I.
“Parts Provider has been an essential supplier to our company going on almost 10 years. They have been able to consistently provide high quality parts to us and have gotten us out of more jams than I can count. I would highly recommend contacting them if you ever have any need for CNC parts, they have a large inventory of product and are always able to help.”
Joe K.

“Our organization has been doing business with Parts Provider for many years. It has been my experience, in dealing with Parts Provider and ordering materials, that they are an exceptional organization that goes above & beyond, very knowledgeable and provide outstanding customer service. We recently needed a part for one of our machines, we called Parts Provider and they shipped it to us immediately. We were unable to return the core for the credit in Part Provider’s time frame, but I called and explained the situation and they were very understanding and allowed us to ship the part back at a later date and still gave us the core credit.
In all of my long-term experience in accounting and purchasing, I have never been more pleased with a supplier such as Parts Provider. I highly recommend them to anyone in need of items that they have to offer.”
Julie W.

“I first came across Parts Provider back in 2010 while doing an internet search for Fanuc robot components. From my initial contact, they have been nothing but professional every time. They are very responsive on quote requests and shipping of items once ordered. They offer both new and reconditioned components, which come with a warranty. I’ve never had an issue with anything that I’ve purchased from them, and would highly recommend them to anyone.”